Các quản trị viên VMware có thể nâng cấp vSphere bằng một quy trình đơn giản bao gồm nhiều trình hướng dẫn hữu ích. Thực hiện theo hướng dẫn này để đảm bảo nâng cấp trơn tru.
VMware vSphere 6.7 đã giới thiệu các cải tiến quan trọng cho ESXi, vCenter và các tính năng khác, vì vậy các quản trị viên VMware nên nâng cấp vSphere 6.5 lên 6.7 để tận dụng các cập nhật này. Trước tiên, bạn nên đọc các ghi chú errata mà VMware cung cấp. Có các mục liên quan đến nhiều môi trường, chẳng hạn như các giới hạn đối với các phiên bản ESXi có thể được nâng cấp. Đối với hầu hết, việc nâng cấp sẽ đơn giản, nhưng tốt nhất vẫn là sao lưu cấu hình vCenterappliance. Với hầu hết các nâng cấp, cần phải nâng cấp thiết bị vCenter và sau đó nâng cấp máy chủ trên cơ sở từng cụm – cụm quản lý đầu tiên, tiếp theo là các cụm khác. Trước khi bắt đầu nâng cấp, hãy tắt bộ lập lịch tài nguyên phân tán (DRS) để ngăn vCenter di chuyển xung quanh vào những thời điểm không phù hợp và làm gián đoạn nâng cấp vSphere.
Prepare to upgrade vSphere 6.5 to 6.7
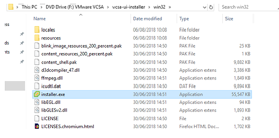
Download the vCenter 6.7 appliance ISO file and mount it. Navigate to the Win32 install folder and double-click the installer executable file.
The installer will ask what action you wish to perform. Select the Upgrade option to start the wizard. Then, accept the license agreement and click Next.
It’s important to understand what happens within the appliance after admins upgrade vSphere 6.5 to 6.7. The installer stands up an empty instance of the new vCenter with a new temporary IP address and does a data migration that imports all the configuration data into the new appliance. Once this is complete and verified, admins can delete the old vCenter appliance. This example only covers the appliance upgrade.
Enter the source appliance fully qualified domain name (FQDN) and click Connect to source. This opens a menu that asks for a single sign-on username, password and appliance password. Enter them as needed. Fill in the rest of the fields — as shown in Figure B below — with the information about the ESXi host that the vCenter appliance sits on.
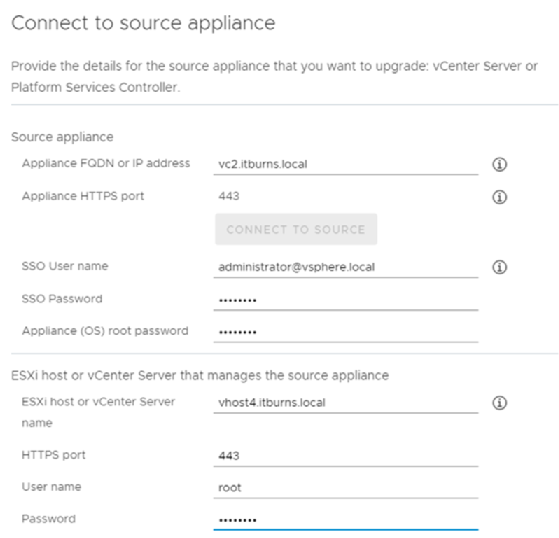
Once all the fields have been filled in, click Next to progress to the next screen. Depending on the configuration, this might prompt a certificate acceptance warning. Click Yes in the warning box, assuming all the information is correct.
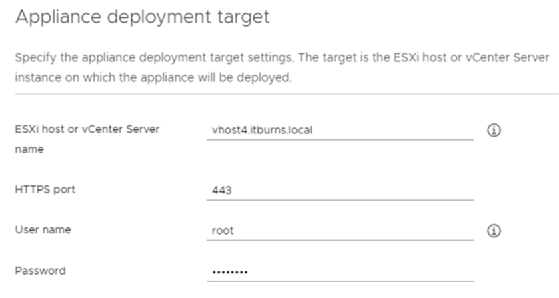
The next screen asks where you want to install the new vCenter. Don’t forget the 6.5 to 6.7 vSphere upgrade essentially stands up a new vCenter and migrates the data from the old to the new. The screen in Figure C below refers to the host on which the new vCenter will deploy. Any cluster member should be an acceptable choice.
Navigate to the next screen and create a new name for vCenter. You can use vCenter’s original name once setup and configuration is complete.
The next step asks for confirmation of the new vCenter’s size. If this is a 6.5 to 6.7 vSphere upgrade, click Next. On the following screen, select the appropriate data store. The chosen data store should be available to all the hosts within the management cluster.
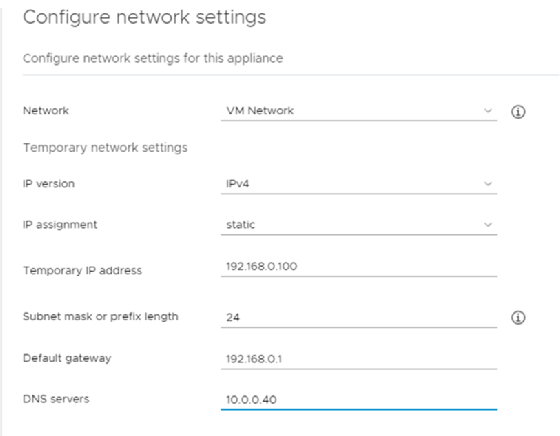
The next step is to give the new vCenter a temporary IP address and FQDN.
Review the settings and click Finish. The installer should then report a successful installation.
Migrate vCenter settings and data
The second phase to upgrade vSphere 6.5 to 6.7 is the behind-the-scenes migration. Admins can revert to the old vCenter appliance at any time before the host upgrade starts.
This stage uses another wizard to finish the vSphere 6.5 to 6.7 upgrade. This process essentially connects to the old vCenter and moves all the settings to the new vCenter — including IP details — and then shut downs the old vCenter.
To initiate the upgrade, the installer does some preflight checks. These checks might include warnings, such as an alert that the migration won’t include 6.5 patches and updates.
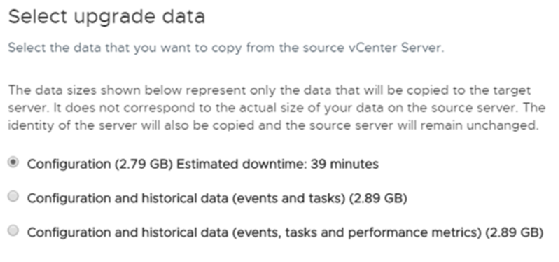
Once you’ve reviewed all the warnings, click Next. At this point, the system asks you to select the historical data to copy to the new server. The amount of data copied will vary depending on the selection. This only affects the historical data, not the functionality of the system. This example only retains the configuration. Then, click Next.
The wizard then offers the option to contribute to VMware customer experience improvement. Click Next. Finally, click Finish to apply the upgrade. There is also a box near the bottom of the form to confirm the creation of a source vCenter backup.
Upgrade hosts with VMware Update Manager
The old vCenter should now be shut down and the new one should be available. Upgrading the hosts is simple and can be done using host profiles. The VMware Update Manager can make the host upgrade simpler.
Open the vCenter GUI and navigate to Update Manager from the home screen. Click on the ESXi images tab and then click Import.
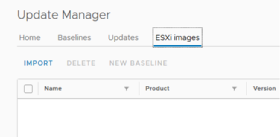
Select the Browse option to navigate to the ESXi 6.7 install ISO file, upload it and import it. This example uses this ESXi image to perform the install. The next step is to create a new baseline for the updated image.
Click the Baselines tab in the Update Manager, as shown in Figure F. Fill in the name and description as appropriate on the following screen. The content options automatically select Upgrade.
Click through to the next page and the previously uploaded ESXi image should be available. Select it, click Next and select Finish on the next page.
The upgrade profile has now been created. The remaining steps require admins to attach the profile, put the host into maintenance mode and perform the update.
Go to the update’s home screen and select Attach from the baseline options. From there, select the newly created baseline. Attach the baseline at the cluster level to make it easier to upgrade the cluster.
There are several ways to upgrade the cluster, including setting the cluster to fully upgrade itself automatically. To be cautious, apply the update, evacuate one host at a time, put it into maintenance mode and select Remediate. Accept the license, check the settings and, if they all appear good, click OK.
To automatically evacuate the VMs from the hosts, the DRS automatic feature needs to be on after the initial vCenter upgrade.
Once the reboot is complete, ensure the patch revision from the 6.5 version is correctly incremented. Repeat the process for the other hosts.
Once the host upgrade is complete, the vSphere upgrade process is complete.
If the preparation work is done beforehand and admins proactively address any known issues, it should be a relatively simple process to upgrade vSphere 6.5 to 6.7.